The goal of this article is to provide you with the best Minecraft remove water tips.
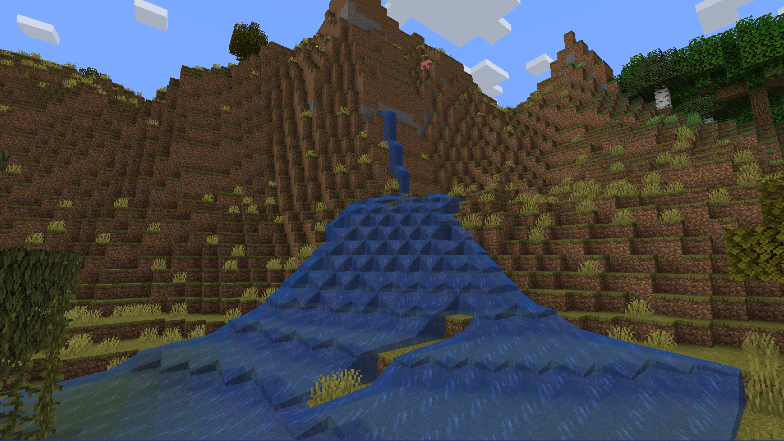
If you’ve been following my let’s play series you’ll know that I’ve been draining an ocean, more specifically I’ve been draining the ocean around an ocean monument.
After doing this, I have developed some tips for draining oceans or large bodies of water, so today I am sharing five tips.
Top 5 Best Tips For Minecraft Remove Water 2022

1. Section OFF Your Water
The first tip I have is to section off areas whenever you are trying to drain something on a large scale. I’m not talking about a small in ground lake here, but something like this or even larger. You’ll want to create sections within this body of water.
How big you want these sections to be really depends on how much you’re willing to place and how much you’d like to struggle to drain your water. I recommend placing walls three to five blocks apart.
It will be very difficult for you to drain the water if your walls are placed farther than five blocks apart like the ones I’m making here. If you place them closer than three blocks, you might be going a little overkill. Personally, I like to place them about three to five blocks apart.
It is the perfect middle ground between placing a lot of walls and having trouble draining the water, so I recommend placing walls three to five blocks apart.
2. Use Gravity Affected Blocks To Make Your Walls
It is all about what you are making your walls out of when you are sectioning off your body of water, which means using blocks like gravel sand or red sand.
Whenever I have a lot of red sand near my base, I always forget about the red sand like I’m alone here and completely forget us in the game. Of course, concrete won’t work because it hardens as soon as it comes in contact with water.
As long as that is the case, the concrete will not work no matter what you do, so you will need a lot of sand for this project, or gravel, really it’s up to you.
I know if you’re on the council and maybe have a smaller world, the sand idea might not be as realistic.
Gravel will also work, you’ll just need to cave a lot to get it, but you’ll want to use gravity effective blocks because it’s much easier to place them, as you can see here I’m not going up and down in the water.
As I move over, I’m just placing the blocks and letting them fall. Blocks like these, which are affected by gravity, will also help you when you remove them because you can break the bottom one, light a torch, and wait for the blocks to fall. You don’t have to keep thinking about each and every block separately.
Trust me, mining every single block would not be fun.
It was really annoying to dig out completely the first time I tried draining an ocean, so now you have your area all sectioned off and walled off and you’re ready to start draining.
3. Use Your Sponge Effectively
Here is my four-wide a little piece of water the easiest way and in my opinion the best way to use your sponge is as follows-
After floating up, you place a sponge below you so you fall on it, then you mine the sponge up and you have a wet sponge in your inventory. Then you move over to the other wall and continue the process.
Typically when I’m doing this, I try and go one block below where I’m standing right now I have two blocks below which is fine and then I switch from wall to wall flipping sides every time.
I’m doing a sponge now this is totally up to you but I like to put the sponge below me because it makes it easier to mine up if I put the sponge down here and I’d be bobbing up and down trying to break it if I was in survival mode.
You will also be slowed down due to being in the water if you’re on top of the sponge, which is annoying.
You won’t get slowed down at all, and it makes straining the water really easy. I actually just came up with this while draining that monument I mentioned earlier.
When I put the sponge right underneath myself, I am able to do this much faster. I also recommend digging up the sponge as soon as possible.
If you’re placing it right beneath you, however, it’s up to you if you’d rather just drain the whole thing and come back and pick it up afterward once you’ve placed a lot of sponge.
When draining out the water, it is inevitable that you will run out eventually as long as you’re not in creative mode. This tip is all about drying out the sponge based on where you are draining so I’m draining a river here.
4. Use Dried Kelp To Dry Your Sponge
I know this tip will apply to you a lot less, but Kelvin to dry out your sponge is a great tip since kelp blocks will smelt things in a furnace.
To smelt up more kelp, you’ll probably find a lot around you, so eventually you’ll have an excess of dried kelp blocks.
As each kelp block smelts 20 items, I am able to dry 20 sponge using one kelp block. I used 60 kelp in the furnace, three kelp locks, and I will get six kelp blocks from this in addition to some extra.
As always, this completely depends on where you are draining; I’m draining this river, so there is no kelp in the river, but there is plenty of kelp in the ocean nearby.
Then I could easily swim around and pick up all of this kelp and bring it over so I could smelt up my sponge that way. This is much better than wasting coal, especially if you’re doing an ocean monument where the sponge will need to be dried out.
It’s not worth your time to get coal when you can utilize the kelp around you to your advantage if you don’t harvest it.
In the end, all of this kelp will grow to the top of your ocean, and it won’t look that cool at all. Almost all of the kelp near me is the same height since I’ve been here for a long time, so just don’t break the bottom one if you want to preserve the kelp, and you can use all of the other ones.
5. Use Torches To Remove Single Water Sources
Last trip for today, and for this tip, you’ll need torches to see if you have an annoying block of water that is still there when you’re draining a body of water. Of course, you could use a sponge to here it under.
If you don’t have a block of water, you can use a torch and place it down. Break the torch, and your block of water is gone. However, this is only going to work if there is one block of water. Here’s one I can place, and there we go, removing a little bit extra water.
Here, though, I have a bunch of sources next to each other.
It won’t work at all if you try and be fast about it but it’s kind of a waste of time. The main thing is to not waste sponges that you will have to dry out on a Cingular water source, so get some torches and make use of them in these situations.
Sometimes you can get rid of the bulk if you’re fast enough, even if you have two or three, which is nice because the sponge doesn’t dry out as quickly, so it makes your job much easier. However, it will only work if you have one or two water sources rather than fou.
Once you get rid of all that, you’ll need to break out your sponge again. Then boom there’s another one I can remove. I lied, I have one more tip for you, it’s a short one I’m sure you already know.
Once you get to that point, here’s how I recommend you get rid of your walls: First, dig out the bottom block. I like to do this with my hand because I can time it better and then put a torch down real quick, and let the walls fall. This is an extremely easy and inexpensive way to get rid of your walls.
Nothing to make, you don’t need a bunch of shovels or pickaxes, just a torch and a little patience because breaking something by hand is of course impossible. However, if you’d like, you can use a shovel and switch over to the torch or hold it in your offhand.
The problem with doing it that way is I frequently fail at doing it that way. So, there it is, my river has been drained, and those are my tips for draining bodies of water.
How to get rid of water in Minecraft
Using a bucket, you can eliminate water from Minecraft. Water will drain from the bucket as a result of the bucket’s design. It is a simple process that can save you time. Make sure you don’t overlook the water supply by keeping an eye on where it is located. It may take some time, but it is worth it.
It may be necessary to use a bucket to prevent water from leaking. In order to remove the water from the block, you will need a bucket. By using the bucket, you will be able to stop the water from running. Using the bucket, you can make a pond anywhere in Minecraft. A NonGravity Block can also be used to create a platform above the flooded area.


Recent Comments